Sunday, July 7, 2013

Green Eggs and Ham

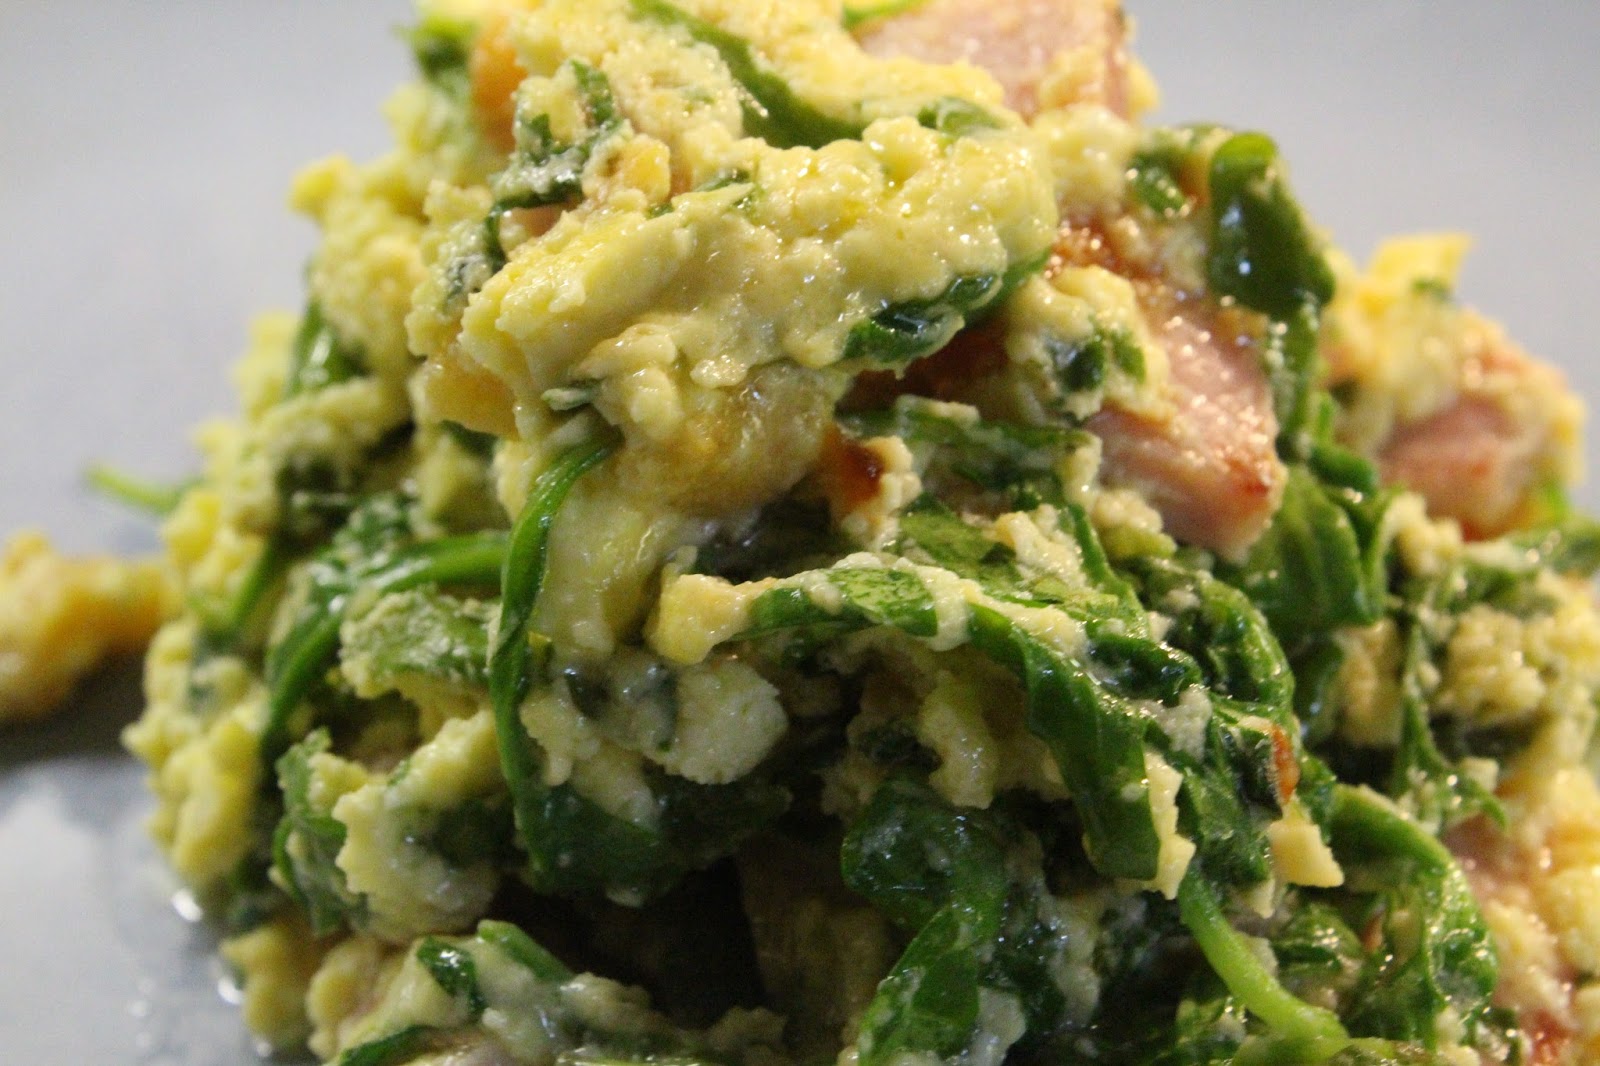
This is my version of Green Eggs and Ham. Great for company and can be easily doubled or tripled.

I've followed a recipe for this dish for some time but this morning I had left over mascarpone and was determined to incorporate it into breakfast. This recipe also includes fresh basil from my herb garden and baby arugula to add more flavour and texture.   Can be easily doubled or tripled. 


Recipe

2 tbsp olive oil
2 cloves of garlic - finely chopped
4-6 slices of Canadian Bacon or Peameal Bacon
2/3cup Mascarpone Cheese (or cream cheese softened with milk)
4 large eggs
1/4 to 1/2 cup chopped fresh basil (more if desired)
2 cups baby arugula
1/4 cup parmesean cheese

Heat frying pan over medium heat add olive oil. Cut bacon into 1 inch squares. Add bacon pieces and garlic to frying pan and cook over medium to med/low heat until garlic is soft, approx 7-8 minutes.  While bacon and garlic are cooking beat eggs, add chopped fresh basil.

 Increase heat to medium.  Add mascarpone to the pan to melt and stir, about one to two minutes.  Add Arugula and stir to wilt, about one minute. Add eggs and stir as you would to make scrambled eggs.  Continue cooking eggs slowly over medium heat until desired doneness.  I prefer my eggs a little on the moist side. I find that if they get cooked too much they become rubbery and runny.  I don't like that.  When they are cooked to your liking turn of the heat and stir in the parmesean cheese.  Serve with toast and coffee or tea, a nice fruit salad and, of course, mimosa!!

I have often made a large batch and placed the eggs in a large dish to serve a group of people at brunch.  Because the ham/bacon is in the eggs you have a one dish main that looks and tastes great.

L


Saturday, May 4, 2013

Chocolate Turtle Cookies

These have got to be my new favourite cookie. I think they will be for a long time. I mean, how can you outdo the combination of rich chocolate, toasty pecans and smooth buttery caramel.  How?

I found this recipe at Pixelated Crumb.  It is an America's Test Kitchen Recipe and really worth making.  I was on Pixelated Crumb recently to recreate those fabulous Garlic Oven Fries this past weekend and I came across their top recipes of 2012.  This one is #1 so, duh, had to try it...

The dough is sticky so it needs to be kept cool for best results.
Here is it after chilling for an hour in the fridge. That chocolate looks so rich.


In some of the reviews I read that it was important to keep the dough chilled before cooking so after initially forming the cooking balls I put the tray in the fridge to keep that butter solid and help the cookie hold its shape

After rolling them in the eggwhite and pecans I formed the caramel cup.


After baking they puff in the cup a bit and need to be pressed again. Do this right away and if the cookie cracks it is really easy to squeeze it back together when they are very warm from the oven

Now they are ready for the caramel jewels.

They are so good and despite the caramel filled cup they are not overly sweet.

Try them, let me know how yours turn out.


Thursday, May 2, 2013

Cake Disaster

To celebrate Valentines Day with the BF, I made a diabetic friendly cake. Twice. It was awful.  Both times.  As a twitter follower of +Epicurious I was eager to submit my experience in response to a call for such dilemmas to @AskKemp.

I was really excited when she responded.  After a few back and forth tweets about the details of the recipe, including a tweet of a picture of the recipe, she replied that she was working on determining the problem and to my total delight - Fixing it!  AND that she wanted to include it in her next column post.

What an honour! She wanted to know if I would be patient! and wait.  Of course I would.  Not only was I excited that she would have a solution, I was beginning to believe that the recipe was flawed and its awfulness was not my doing.  Phew!

I was thrilled when I read this tweet.  As soon as I got home I checked out her post.

She made the original recipe, included a picture and posted the new and improved recipe in her post.  The original recipe turned out exactly like mine. But the new and improved recipe....  Wow! What a gorgeous looking cake.  I don't think I can post a copy of the photo but encourage you to go and take a look at the post.  The details about why the recipe didn't work are pretty impressive.

The new and improved recipe is now available under the member recipes on Epicurious.

I hope to try it out very soon!!  I will post my results. If you try this recipe please let me know how it works out for you!

Oh...  and Thank you so much, Kemp!!!

Lori


Thursday, April 25, 2013

Mounting a Map Poster as Art

Coming soon...

Map Art Project

I have a large map almost 3 feet by 4 feet and a smaller one, just under 2 ft x 3 ft that I found on Wikimedia Commons.

Did you know that there are tons of copyright-free images there?

I found a really seventeenth century map of the region of Italy where my family comes from and an eighteenth century map of the region where my boyfriend comes from.  I am in the process of mounting the smaller map on foam board this week so that I can hang it on the wall.  I will update the website as the project progresses.  When I have successfully completed the project I will move on to the larger map and post some photos.


Wednesday, April 10, 2013

Skeleton Key Art

Think 'Restoration Hardware' for a fraction of the price.

Online at RH you can purchase a single framed skeleton key for $99.  I had some keys that I have been hoarding for several years, waiting for inspiration.  The shadow boxes were on sale this week at Michaels, I had the paper and spray adhesive from another project.  The only other item I purchase for this project was the E-6000 glue. You can pick up skeleton keys from eBay and put together your own for so little.  I think I spent less than $20.


I started by tracing the backing onto good quality paper, cutting it out, then gluing it to the front side of the backing piece with spray adhesive.  I let it set for an hour.


I drew a blank template matching the size of the backing. I drew centre lines down and across to play with placements on the template.  When I found a layout I liked I used the measurements from the template then traced a light pencil line on the backing where I would glue each key in the right spot.


I used clear E-6000 glue to hold the keys in place...  Tip! put the glue on the keys, NOT on the paper.  The glue is stringy and it will mark the backing paper.


I also suggest having some spacers for keys that don't lay flat, like those big clock keys. I used large toothpicks. The keys tend to roll to one side, which is likely not anyone's the desired result.

I left them overnight to set, cleaned up the shadow boxes, assembled them and hung them in our entryway.


Monday, April 8, 2013

The Best Homemade Frites

These are, Seriously, the best Oven Frites I have ever tasted. I believe that they are probably healthier than anything that comes from a restaurant deep fryer or out of a plastic bag from the grocery store freezer.

I followed this recipe from Pixelated Crumb.  I only made two large potatoes and I ended up with an overcrowd the pan. I  can appreciate the difference spreading out the fries and keeping them in a single layer would make to the final product.  Oh well, maybe another trip to my favourite kitchen supply shop and another serving of garlic fries.

I didn't make the garlic aioli and I didn't miss it. These are so flavourful that they can be enjoyed with just the spice mixture and garlic oil. 

Using only two large russet potatoes I ended up with lots of fries.  The mandolin really saves time and produces nice consistently sized fries. I left the skins on... I like them that way and one less step.


Here is the garlic lightly sautéing in the oil. 


One of the steps in the recipe tells you to oil the pan and sprinkle it with sea salt and pepper. I thought it made a really interesting landscape. 


I put all my spices in a little bowl and was very intrigued by the colours. I think they are so beautiful.  And when people say to have lots of colour in your meals I will think about my fries.


Your hands are going to get messy.  Jump in, it's worth it.


It's easy to see here that there are too many fries the pan is too small for the amount of fries I made


 Before baking

Yeah, sometimes this happens when I cook.


The final product


Try these, you'll love them. And as they cook they fill up the house with the aroma of those colourful spices.


Here's the link to the Pixelated Crumb's Recipe again.

Enjoy!! I am off to make my third batch of Avocado Brownies this week.

Saturday, April 6, 2013

Avocado Smoothie

After trying the Avocado Brownie Recipe from the Chubby Vegetarian's website I eyed their Avocado Mango Smoothie and included the ingredients in my shopping list for Saturday morning. 


 I love the colour. 


I made them this morning. I didn't add the honey (trying to cut down on sweets) and didn't really miss it. I did use a significantly increased amount of almond milk compared to what is called for in the recipe.  

We will have these again!!!


Thursday, April 4, 2013

Browniecados...? Yes Please!!

Yes Please, indeed!!

A family member sent this post to me a few days ago from the Chubby Vegetarian's Blog.  He made them last night and confirms that they are delish!!

So, looking for an excuse, justification really, to replace my damaged mini-muffin baking pan, I jumped right in...

Click here to link to Chubby Vegetarian's Recipe


I admit that the contrast does not look appealing.


My batter made enough to fill 16 mini muffin cups to about 2/3's full and I baked them for 18-20 minutes.


Whuut..  where did that one go???  :-D


I would recommend trying these.  You cannot tell that there is avocado in the mix and they are moist and chewy too.


The Lovely Iris!

In December 2012, a couple of weeks before Christmas a new member of the family arrived. An early Christmas gift from my honey.  And she's purple! Even cooler!


I think she is gorgeous!! A six quart bowl professional 600 series.  Wow! am I ever fortunate. Someone really likes me.


Iris and I made doughnuts, whipped cream, tiramisu and the best cookies, ever!  the list goes on.  In fact she plays a starring role on the Smalldeluxe Blog.  Since she came home to live with us she has inspired me to become more adventurous in the kitchen.

Not long after she came home I noticed that she was experiencing some problems with her switch and at high speeds she just didn't seem to work smoothly.

I called Whirlpool to find out how to correct the situation and they offered to replace her, straight out...  I was pleasantly surprised at how quickly and efficiently they wanted to rectify the situation. Unfortunately at the time they only had four colours in stock and my beloved boysenberry stand mixer was not available.  They suggested that I try at a later time.

I called on Monday to try again and I was so pleased that they had one in stock and I could expect it within the next three to four weeks.

The new Iris came today (Thursday). "That was quick!".  I had planned on baking today and I had one last spin with Iris before I send her back to her maker (literally).  Here is the post of my last adventure with Iris.  


Goodbye Iris...  I will miss you. 


I look forward to more adventures with the new Iris.


New Iris on the left, Iris I, on the right.

Friday, March 29, 2013

Homemade Easter Creme Eggs

Since I have some time to spare I thought that I would try this out.  I will post a link at the bottom to the original recipe if you feel that you are brave enough to give it a try.

They started out lots of fun.  The chocolate coating work was tough.  After coating I swore this was my first and last batch.  After cutting one open and tasting it..... I may reconsider.


When I added the colouring I used about 5 drops of yellow. I found the yellow alone was too yellow, like neon-looking. I added one drop of red to the candy but it was a bit more than I needed so I corrected it with extra yellow. In total I used about 15 drops of yellow to one drop of red. I'm glad I did, I love the way they turned out.  You can see the results in photos near the end of the post.

While working with the candy I had a bowl of ice water to keep my hands cool and found that wet hands don't stick to the candy as much.  I dipped as needed.

Use parchment paper.  This stuff is very sticky.  I read some one's blog and they used tin foil and regretted it.

It is important to keep the candy as cold as possible and work quickly.  It is really soft and loves to melt at your touch.

It reminds me of playing with play dough as a kid.  


After forming I put them in the freezer overnight.  Not because they needed to be there that long, I just didn't have time to coat them that night.


I tried using my bare hands, toothpicks, and two forks to roll them around in the chocolate. 


If I make them again I will use the toothpicks and leave them inserted in the egg and not remove them until the chocolate has set.  I read that tip somewhere - After I was finished of course.


I set them in the fridge and then wrapped them up in squares of parchment paper for transporting to the family dinner.


Here is one of the ugly ones (ran out of chocolate so it was kind of a bit of a Frankenstein looking shell).  I was very pleased.  Delicious, sweet, vanilla and chocolate. And I am very happy with the colour of the yolks.


Link to the recipe that I used.

http://www.instructables.com/id/Homemade-Cadbury-Creme-Eggs/?ALLSTEPS